Easy Granny Square Crochet Pattern: Step-by-Step Guide
A stack of these soft, squishy motifs feels like a collection of tiny, handmade treasures waiting to be transformed into a cozy blanket or a set of colorful throw pillows. This classic square design relies on simple double crochet stitches and chain spaces, making it a reliable project for anyone wanting to build confidence with their hook. You will find that the rhythm of the rounds becomes second nature within minutes, helping you create even edges without the frustration of curling corners. Whether you are clearing out your yarn stash or starting a large gift, this project offers a satisfying way to work through your scrap collection at a comfortable pace.
Why You’ll Love This Pattern
This beginner-friendly classic granny square project offers a meditative, repetitive rhythm that is perfect for those evenings when you want to keep your hands busy without complex counting. Because it works in individual motifs, you can easily carry a single square in your bag to crochet during short waits or commutes. The design is exceptionally scrap-yarn friendly, allowing you to use up leftover bits of worsted weight wool or cotton to create a colorful, eclectic look. You can finish a single motif in under twenty minutes, making it an ideal choice for building a larger blanket or pillow over time.
I finally learned how to make a proper square without the edges curling because the chain spacing in this pattern is so clear and consistent.
— Sarah, hobbyist crocheter
Pattern Overview & Skill Level
- Skill Level: Beginner
- Approximate Time: 15-20 minutes per square
- Construction: Rounds worked from the center outward
- Finished Dimensions: Approximately 5 inches by 5 inches using recommended materials
Materials & Supplies Needed
- Yarn: Worsted weight (#4), wool or acrylic blend, approximately 15 yards per square.
- Hook Size: 5.0 mm (US H-8).
- Notions needed: Yarn needle for weaving ends, small scissors.
- Safe yarn substitutions: You may use DK weight yarn for a smaller, more delicate square, though you will need to increase the hook size or add more rounds to maintain the same dimensions. Cotton yarn will result in a stiffer, more structured square compared to the drape of acrylic or wool.
Stitch Guide & Abbreviations (US Terms)
- ch = chain
- st/sts = stitch/stitches
- sl st = slip stitch
- dc = double crochet
- dc-cluster = 3 double crochets worked into the same space
- sp = space (the hole created by the chains in the previous round)
- MR = magic ring
Step-by-Step Pattern Instructions
Granny Square Base
- Rnd 1: Start with a MR. Ch 3 (counts as first dc), work 2 dc into the ring, ch 2, 3 dc into the ring, ch 2—repeat from * to * two more times. Join with a sl st to the top of the beginning ch 3. (12 sts, 4 ch-2 sps)
- Rnd 2: Sl st into the next dc and into the first ch-2 sp. Ch 3, 2 dc, ch 2, 3 dc in the same ch-2 sp. Ch 1, (3 dc, ch 2, 3 dc) in the next ch-2 sp—repeat from * to * two more times. Ch 1, join with a sl st to the top of the beginning ch 3. (24 sts, 4 corner sps, 4 side sps)
- Rnd 3: Sl st into the next 2 dc and into the corner ch-2 sp. Ch 3, 2 dc, ch 2, 3 dc in the same corner sp. Ch 1, 3 dc in the next ch-1 side sp, ch 1, (3 dc, ch 2, 3 dc) in the next corner sp—repeat from * to * two more times. Ch 1, 3 dc in the final side sp, ch 1, join with a sl st to the top of the beginning ch 3. (36 sts, 4 corner sps, 8 side sps)
Finishing
Once you complete the final round, fasten off your yarn, leaving a 6-inch tail. Use your yarn needle to weave the end through the back loops of the stitches on the reverse side of the square. Pull slightly to secure the tension before trimming the excess yarn flush against the fabric.
Care & Washing Instructions
- Hand wash your finished items in cool water with a gentle wool-safe detergent to preserve the structure of the stitches.
- Lay the squares flat on a clean towel to dry, avoiding direct heat or sunlight that might cause the fibers to shrink or stiffen.
- Block your finished squares by pinning them to a foam mat while damp to ensure perfectly straight edges and consistent dimensions.
Pro Tips & Common Mistakes to Avoid
- Maintain consistent tension by ensuring your dc-clusters are not pulled too tightly; the chains should be loose enough to allow the corner to lay flat.
- Place a stitch marker in the top of your beginning ch-3 at the start of each round so you can easily identify where to join with a sl st at the end.
- Weave your ends in as you go if you are using multiple colors, as this prevents an overwhelming amount of finishing work once your project is complete.
- Adjust the size of the square by simply adding more rounds following the pattern established in Round 3, though note that larger squares will require significantly more yardage.
Frequently Asked Questions
Can I use a different hook size for this pattern?
Yes, you can use a larger or smaller hook to achieve a different drape or scale. A larger hook will create a looser, lacy fabric, while a smaller hook will result in a dense, tight square.
Is this pattern suitable for complete beginners?
Absolutely, this is an ideal starter project. It introduces the fundamental concepts of working in rounds and basic cluster stitches without requiring complex shaping.
Can I sell the squares I make from this pattern?
Please check the specific terms provided in the original pattern source documentation. Generally, individual makers may sell finished items, but the pattern itself remains the property of the designer.
What happens if my square starts to curl into a bowl shape?
Curling usually indicates your tension is too tight. Try loosening your stitches or moving up one hook size to give the fabric more room to expand flat.
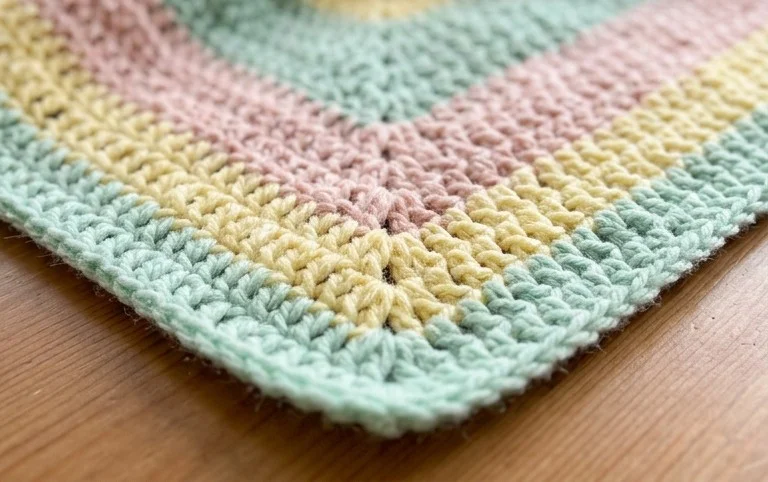
Your new handmade square will gain a distinct personality if you alternate between solid colors for each round or use a variegated yarn for a softer blend. Once you have finished your first few pieces, you can join them using a flat slip stitch seam to make a warm afghan or a small tote bag. Sharing your progress on social media helps other makers see how different color combinations turn out. You are welcome to browse the rest of the blog for more patterns that use these basic stitches.