Easy Crochet Halloween Pumpkin Keychain: Free Pattern
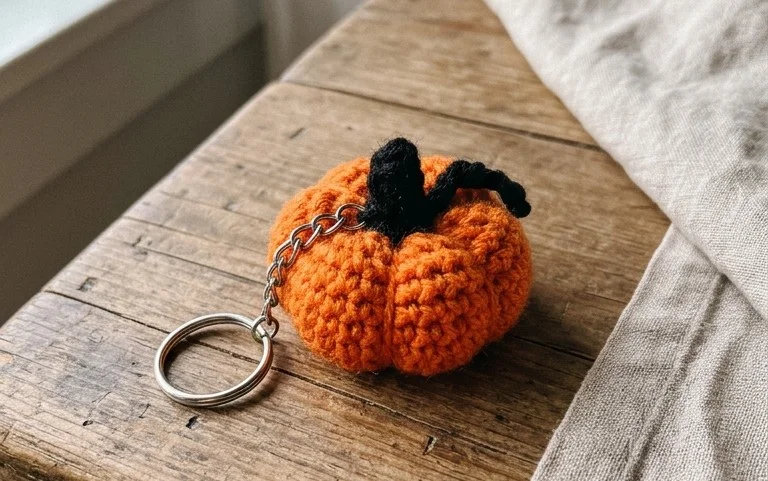
Bright orange cotton yarn creates a dense, satisfying squish that makes this little gourd feel substantial in your hand. Measuring six inches across, this project fits into a single afternoon while helping you master the art of working in continuous rounds without visible seams. It provides a tactile way to clear out your scrap bin before the holiday rush begins. Beginners often find the transition from simple circles to rounded shapes frustrating, yet this specific guide clarifies how to maintain even tension throughout each increase and decrease. You gain confidence as the structure grows from a flat magic ring into a sturdy, handheld object ready for your keys or a seasonal display.
Why You’ll Love This Pattern
This crochet project produces a classic, sturdy 6-inch amigurumi sphere, which serves as a foundational skill-builder for anyone learning to work in the round. It is a quick afternoon project that requires very little yarn, making it an ideal choice for using up leftover scraps from larger blankets or garment projects. The repetitive nature of the single crochet stitches creates a meditative rhythm that is perfect for relaxing after a long day. Because of its simple construction, it is highly customizable for those who want to add felt features, embroidered faces, or safety eyes to create unique creatures.
I finally mastered invisible increases and decreases with this pattern. The instructions were clear, and my sphere turned out perfectly round without any awkward gaps in the fabric.
— Sarah, amigurumi hobbyist
Pattern Overview & Skill Level
- Skill Level: Beginner
- Approximate Time: 60 to 90 minutes
- Construction: Working in continuous rounds starting with a magic ring, followed by increasing, even rounds, and decreasing.
- Finished Dimensions & Sizing: Approximately 6 inches in diameter when worked in worsted weight yarn with a 4.0 mm hook.
Materials & Supplies Needed
- Yarn: Worsted weight (#4), 100% cotton or acrylic, approximately 50 yards.
- Hook Size: 4.0 mm (US G-6).
- Notions: Polyester fiberfill stuffing, tapestry needle for weaving ends, stitch marker to keep track of round starts, and sharp scissors.
- Safe yarn substitutions: You can use DK weight yarn with a 3.5 mm hook for a smaller, denser finish or bulky weight yarn with a 5.0 mm hook for a larger, softer toy. Note that changing yarn weight will significantly affect your final size and require more or less stuffing.
Stitch Guide & Abbreviations (US Terms)
- MR: Magic Ring (a way to start a round by crocheting into an adjustable loop).
- ch: Chain.
- sc: Single crochet.
- inc: Increase (work 2 sc into the same stitch).
- dec: Decrease (sc2tog, or single crochet two stitches together to form one).
- sl st: Slip stitch.
- st/sts: Stitch/stitches.
Step-by-Step Pattern Instructions
Sphere Body
- Rnd 1: Start 6 sc in a MR (6 sts).
- Rnd 2: 2 sc in each st around (12 sts).
- Rnd 3: [1 sc, inc] 6 times (18 sts).
- Rnd 4: [2 sc, inc] 6 times (24 sts).
- Rnd 5: [3 sc, inc] 6 times (30 sts).
- Rnd 6: [4 sc, inc] 6 times (36 sts).
- Rnd 7-12: Sc in each st around (36 sts).
- Rnd 13: [4 sc, dec] 6 times (30 sts).
- Rnd 14: [3 sc, dec] 6 times (24 sts).
- Rnd 15: [2 sc, dec] 6 times (18 sts).
- Rnd 16: [1 sc, dec] 6 times (12 sts).
- Rnd 17: [dec] 6 times (6 sts).
Finishing
After completing Round 17, cut your yarn leaving a 6-inch tail. Use your tapestry needle to weave the tail through the front loops of the remaining 6 stitches. Pull the tail tightly to close the opening completely. Secure the yarn with a knot and weave the remaining end into the center of the sphere to hide it.
Care & Washing Instructions
- Hand wash your finished item in cool water using a gentle soap to prevent fiber distortion.
- Lay the piece flat on a clean towel in a shaded area to air dry, ensuring it stays in its spherical shape.
- If the item becomes squashed over time, gently massage and roll it between your palms to redistribute the fiberfill and reshape it.
Pro Tips & Common Mistakes to Avoid
- Maintain consistent tension throughout the project; if your tension is too loose, the stuffing will show through the gaps between stitches.
- Always place a stitch marker at the first stitch of every round. Working in continuous rounds without a marker often leads to losing count, which makes the sphere uneven.
- Weave in your yarn ends by pulling them inside the sphere rather than cutting them close to the surface, which ensures they do not poke out after washing.
- If you choose to adjust the size, add more rounds of increases for a larger sphere. Keep in mind that for every increase round you add (e.g., 5 sc, inc), you must add an equal number of even rounds and decrease rounds to maintain the spherical shape.
Frequently Asked Questions
Can I use a different yarn weight for this pattern?
Yes, you can use any weight of yarn, but be sure to use a hook size smaller than the one recommended on the yarn label to keep the stitches tight so the stuffing does not show through.
Is this project suitable for a complete beginner?
This is an excellent project for beginners because it uses only the single crochet stitch and teaches the essential concepts of increasing and decreasing in the round.
How do I keep my edges from looking bumpy?
Use an invisible decrease instead of a standard sc2tog. To do this, insert your hook into the front loop of the next two stitches, yarn over, pull through both loops, yarn over again, and pull through both loops on the hook.
Can I sell the items I make from this pattern?
You are welcome to sell finished items created from this pattern. Please check the specific terms provided by the designer or website policy if you intend to sell items in large commercial quantities.
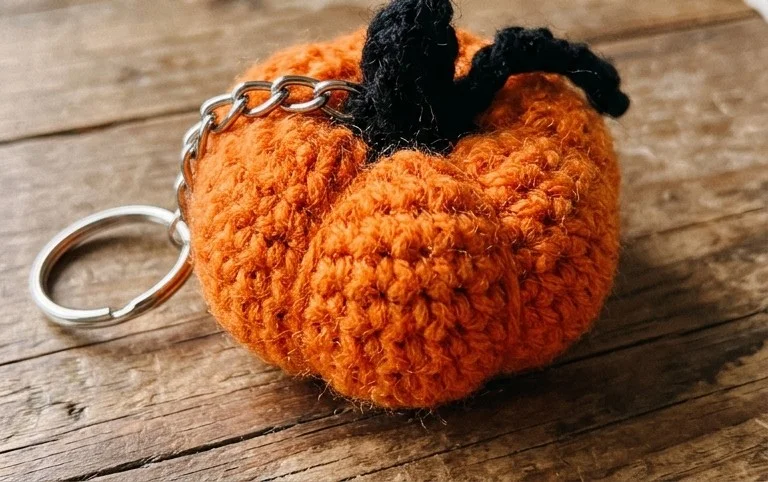
Your new handmade accessory adds a touch of personality to any bag or set of keys, making it a reliable companion throughout the autumn season. If you want to experiment with the design, try using a bulky velvet yarn to create a larger, softer version that feels like a mini throw pillow. Seeing your finished work brings me joy, so feel free to tag your photos online so I can see your color choices. You can find more scrap-friendly, beginner-focused tutorials by browsing the archives on the main page of this site.